How to Use an AeroPress: The Ultimate Guide to Brewing Perfect Coffee
Affiliate Disclosure: As an Amazon Associate, I earn from qualifying purchases. This post may also contain other affiliate links, meaning I may earn a small commission if you buy through them, at no extra cost to you. Your support helps keep this site running and allows me to continue sharing great content. Thank you!
Are you ready to elevate your coffee game with a simple and versatile brewing method? Whether you’re a seasoned barista or just starting your coffee journey, learning how to use an AeroPress will open up a world of rich, flavorful coffee right at home.
Invented by Alan Adler in 2005, this unique coffee maker quickly became a favorite among coffee enthusiasts. It’s known for its ability to produce a smooth, full-bodied brew in just under two minutes.
What makes the AeroPress stand out is its innovative design, which combines pour-over, immersion, and pressure brewing techniques. This results in a coffee experience that’s both customizable and satisfying. You can experiment with grind size, water temperature, and brewing time to find your perfect cup.
The AeroPress is also portable, affordable, and easy to use, making it an essential tool for anyone serious about their coffee, whether you’re brewing at home, in the office, or on the go.
In this guide, we’ll explore every step of using an AeroPress, from understanding its origins and components to mastering both classic and advanced brewing techniques. Let’s dive into the remarkable story behind this revolutionary coffee maker and how it changed the coffee world forever.”*
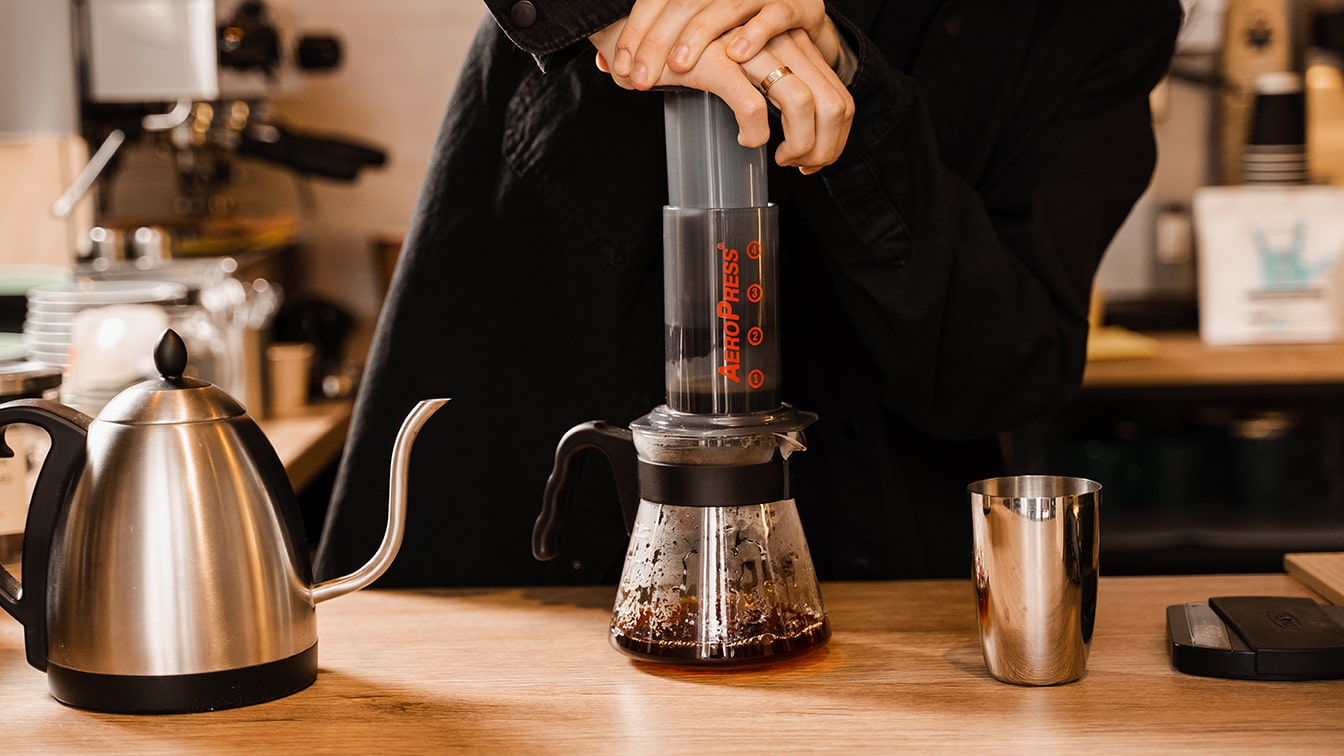
To see the AeroPress in action and learn more about its innovative brewing process, check out this video:
Key Takeaways:
- Versatile Brewing: The AeroPress combines pour-over, immersion, and pressure brewing techniques, offering a customizable coffee experience for any preference.
- Essential Gear: Using the right AeroPress tools and high-quality, freshly roasted coffee beans significantly enhances your brewing results.
- Master the Basics: Consistency in grind size, water temperature, and coffee-to-water ratios is crucial for achieving a perfect cup of AeroPress coffee.
- Classic vs. Inverted Methods: The Classic Method offers quick, consistent results, while the Inverted Method provides more control and a stronger brew.
- Troubleshooting: Address common AeroPress issues like weak coffee, leaks, and plunger resistance by adjusting grind size, steeping time, and maintaining proper cleaning practices.
- Advanced Techniques: Experiment with espresso-like concentrates, iced coffee, different coffee origins, and unique flavors to expand your AeroPress brewing skills.
- Reflect and Refine: Keep a coffee journal to track your methods and improve your brewing technique over time.
Gear You Need for AeroPress Success
To brew the perfect cup of coffee with an AeroPress, having the right tools and ingredients is essential. The AeroPress kit is thoughtfully designed to help both beginners and seasoned coffee enthusiasts achieve consistently great results. Here’s what you’ll need to get started.

AeroPress Kit Components
The AeroPress kit typically includes:
- Main Chamber: Holds the coffee grounds and water, with a capacity of up to 260 mL, ideal for an 18-gram coffee dose.
- Plunger: Pushes brewed coffee through the filter using air pressure, extracting rich flavors.
- Filter Cap and Paper Filters: Ensure your coffee is smooth and free of grounds. AeroPress filters are affordable and reusable for multiple brews.
- Stirrer and Funnel: The stirrer evenly saturates the coffee grounds, while the funnel helps transfer grounds into the chamber mess-free.
Selecting Coffee Beans
Choosing the right coffee beans is crucial for brewing a flavorful cup of AeroPress coffee. Freshly roasted beans are the best option, preserving the oils and flavors that make coffee rich and complex.

Light Roasts: Light roasts highlight bright, fruity notes, with delicate flavors like citrus, berries, and florals. These beans are often sourced from regions like Ethiopia or Kenya, known for producing vibrant and nuanced coffees. The AeroPress enhances these subtle flavors, making light roasts an excellent choice.
Medium Roasts: Medium roasts offer a balance between acidity and sweetness, with flavor notes ranging from chocolate and caramel to mild fruit and nuts. Often originating from regions like Colombia or Guatemala, these beans provide a smoother, well-rounded cup. The AeroPress allows you to extract a full range of flavors, maintaining a balanced profile.
Single-Origin Coffees: For an even richer experience, try single-origin coffees. These beans, sourced from one location, offer distinct flavor profiles that reflect the region’s terroir. Single-origin beans bring out unique flavors, making each cup of AeroPress coffee truly memorable.
Ready to choose the perfect beans for your next AeroPress brew? Check out my curated list of the Best Coffee Beans for AeroPress Brewing.
Perfecting the Grind and Water Temperature
The grind size and water quality are critical to achieving the best AeroPress coffee. For optimal extraction, a medium-fine grind, similar to table salt, is ideal. This ensures a balanced extraction, preventing weak or bitter flavors.
Invest in a quality burr grinder, like the Hario Slim Handmill or Baratza Virtuoso+, to improve consistency. Unlike blade grinders, burr grinders produce a uniform grind size, crucial for even extraction and better flavor. Consistent grind size helps avoid over- or under-extraction, ensuring each cup is just right.

Water quality is equally important—opt for bottled or filtered water to avoid unwanted flavors from tap water. The ideal water temperature is around 200°F (93°C) for optimal extraction. For lighter roasts, experiment with slightly cooler water temperatures (175-185°F / 80-85°C) to enhance delicate flavors.
Prepping Your Gear
Before you start brewing, take a moment to prep your AeroPress and equipment:
- Rinse the paper filter to remove any papery taste and warm up the AeroPress.
- Use a kitchen scale to measure your coffee grounds and water accurately, ensuring consistency with every cup.
Now that your AeroPress gear and ingredients are prepped, let’s dive into the step-by-step guide to making the perfect cup.
How to Brew with an AeroPress: Step-by-Step Guide
Now that you’ve gathered your essential tools and ingredients, it’s time to dive into the brewing process. Follow these steps carefully to create a smooth, rich cup every time.
1) Prep Your AeroPress
Assemble your AeroPress by placing a paper filter into the filter cap, then rinse it with hot water. This eliminates any papery taste and preheats the AeroPress, ensuring a consistent brewing temperature. Attach the filter cap to the main chamber and position the AeroPress over your coffee mug or carafe.
2) Measure Coffee and Water
The foundation of a perfect brew lies in the right coffee-to-water ratio. Use 15-17 grams of coffee (about 2 ½ tablespoons) for a standard AeroPress recipe. Adjust the amount based on your preference for a stronger or milder brew. For water, aim for a temperature between 175-205°F (80-96°C), depending on your roast. Lighter roasts benefit from lower temperatures, while darker roasts can handle higher heat.
3) Add Coffee Grounds and Water
Add the measured coffee grounds to the AeroPress chamber. Pour half of your hot water over the coffee grounds, ensuring they are fully saturated. This step is crucial for even extraction, allowing the grounds to bloom and release their aromatic compounds. Stir the mixture using the included stirrer for about 10 seconds to ensure all grounds are evenly immersed.
4) Press for Consistency
Insert the plunger into the chamber just above the water level to create a seal. Slowly press down with consistent pressure. The ideal pressing time is about 20-30 seconds, with a slow and steady push. You should feel some resistance, but it shouldn’t be too difficult to press. If the plunger is hard to push, your grind size may be too fine.
5) Stir, Steep, and Plunge
Let the coffee steep for 30 seconds to a minute, depending on your taste preference.
For a lighter, more delicate brew, aim for a shorter steeping time of around 30-40 seconds. This quick steep enhances the coffee’s acidity and brings out brighter, fruitier notes, especially with a lighter roast.
For a richer, more full-bodied cup, extend the steeping time to 1-2 minutes. This longer steep allows for more extraction, drawing out deeper, chocolatey, and caramel flavors, which works particularly well with medium to darker roasts.
Adjusting the steeping time controls the strength and flavor profile of your coffee, allowing you to tailor each cup to your preference.
Once the steeping time is up, press the plunger down slowly, aiming for a smooth, consistent motion. When you hear a hissing sound, your brew is ready.
With the basics of AeroPress brewing under your belt, it’s time to elevate your skills by exploring two popular methods: the Classic and Inverted approaches. Each offers a unique way to brew, giving you greater control over flavor and strength.
Classic vs. Inverted: AeroPress Brewing Techniques
Once you’ve mastered the basic brewing process, it’s time to explore two primary methods of using the AeroPress: the Classic Method and the Inverted Method. Each offers a unique approach to extracting flavors, allowing you to tailor your brew to your preferences.
Universal Steps
Regardless of which method you choose, these key steps remain consistent:
- Measure Coffee Grounds: Use 15-17 grams of coffee for a balanced brew.
- Add Hot Water: Pour hot water (175-205°F) over the coffee grounds to saturate them evenly.
- Stir: Stir the mixture for 10 seconds to ensure even saturation.
- Steep: Let the coffee steep for 30 seconds to a minute, depending on your desired strength.
Now, let’s break down each method and what sets them apart.
Classic Method: Simple and Quick
- Setup: Place the AeroPress on top of your coffee mug with the filter cap and paper filter securely in place.
- Press: After steeping, insert the plunger and press down slowly and steadily for 20-30 seconds until you hear a hissing sound.
- Yield: Typically yields 10-12 oz of coffee.
The Classic Method is ideal for those who value convenience and consistent results. It’s quicker and easier to manage, with less risk of spills, making it perfect for a quick brew on busy mornings.
Inverted Method: Strong and Robust
- Setup: Insert the plunger into the chamber and stand the AeroPress upside down on a flat surface.
- Flip and Press: After steeping, carefully attach the filter cap, flip the AeroPress onto your mug, and press down slowly and steadily for 20-30 seconds.
- Yield: Typically yields 8-10 oz of coffee.
The Inverted Method allows for a longer steeping time, resulting in a stronger, more robust flavor. This method offers more control over the brewing process but requires careful handling to avoid spills.
Before we dive into the detailed comparison between the Classic and Inverted brewing methods, check out this quick video that walks you through each technique. It’s a helpful visual guide that complements the step-by-step instructions and highlights the key differences between the two methods.
Now that you’ve seen both methods in action, let’s compare them side-by-side to help you decide which one suits your brewing style.
Key Differences Between the Classic and Inverted Methods
| Method | Pros | Cons |
| Classic | Simpler and quicker, with less risk of spills. | Shorter steeping time may result in a weaker flavor. |
| Ideal for consistent results, especially when you’re in a rush. | ||
| Yields slightly more coffee (10-12 oz). | ||
| Inverted | Allows for a longer steeping time, producing a stronger flavor. | Slightly more complex and requires careful handling to avoid spills. |
| Offers more control over the brewing process. | Yields slightly less coffee (8-10 oz). |
Which Method Is Right for You?
Choosing between the Classic and Inverted methods ultimately depends on your taste preferences and time availability.
If you want a quick, consistent brew, the Classic Method is your best bet. It’s straightforward and easy to manage, making it ideal for busy mornings.
However, if you prefer a richer, more robust flavor and don’t mind a bit of extra effort, the Inverted Method is perfect for you. It offers more control over the brewing process, allowing you to extract deeper flavors.
Now that you’ve explored the different brewing techniques and found your preferred method, let’s look at some common issues that may arise during brewing and how to troubleshoot them for consistently great results.
Troubleshooting Common AeroPress Issues
Brewing coffee with an AeroPress is usually straightforward, but even the best techniques can encounter some hiccups. From weak coffee to inconsistent pressure, minor issues can impact your brew’s quality. Here’s how to address the most common problems:
1. Weak or Bitter Coffee
- Weak Coffee: Use a finer grind or increase your coffee-to-water ratio. Make sure to steep the coffee for the recommended 30-60 seconds to extract enough flavor.
- Bitter Coffee: Opt for a coarser grind, reduce steeping time, or lower your water temperature (around 175°F for lighter roasts) to reduce bitterness.
2. Preventing Leaks and Ensuring Proper Pressure
- Leaks: Ensure the filter cap is secured, and the plunger creates a tight seal to avoid leaks during pressing.
- Resistance Problems: If pressing is difficult, check your grind size. Finer grinds can cause excessive resistance. Inspect the plunger seal for wear and replace it if necessary.
3. Cleaning and Maintenance
- After Each Use: Rinse the plunger and chamber with hot water to prevent coffee buildup and maintain clean flavors for your next brew.
- Deep Cleaning: Occasionally, soak parts in warm, soapy water and scrub the filter cap and rubber seal to maintain proper function and extend the life of your AeroPress.
4. Maximizing Longevity
- Storage: Keep your AeroPress in a cool, dry place to prevent wear on the rubber seal. Replace worn-out parts like the plunger’s rubber seal to extend its lifespan.
- Water Quality: Use filtered water to prevent mineral buildup and preserve the lifespan of your AeroPress.
With these troubleshooting tips and maintenance practices, you’ll be well-equipped to handle any issues that arise, ensuring that every cup of AeroPress coffee is as delicious as the last.
Now that you’ve mastered the basics and resolved any common issues, it’s time to take your AeroPress brewing to the next level. These advanced techniques will help you unlock even more flavor, create new coffee styles, and refine your brewing skills.
Advanced AeroPress Techniques
Once you’re comfortable with the basic brewing methods, it’s time to explore advanced techniques to truly customize your AeroPress coffee experience. These methods allow you to experiment with new flavors, create different coffee styles, and push the boundaries of what this versatile device can do.
Create Espresso-Like Concentrates
While the AeroPress doesn’t produce true espresso, you can create a concentrated brew that mimics its intensity and richness.
Use a finer grind—similar to what you’d use for an espresso machine—and increase the coffee-to-water ratio to around 20-22 grams of coffee to 100-120 mL of water.
The Inverted Method is recommended for better control over extraction. After steeping, press slowly to create a strong, flavorful brew perfect for lattes, cappuccinos, or Americanos.
Check out this helpful video for a step-by-step guide on creating espresso-like coffee with an AeroPress. It demonstrates the technique in detail, giving you the visual cues to master this method and brew a strong, flavorful cup that rivals espresso.
Brew Refreshing Iced Coffee
To make iced coffee, start with a strong coffee concentrate (around 18 grams of coffee to 100-120 mL of water).
- Brew using your preferred method—Classic or Inverted—then pour it directly over a glass filled with ice. The ice will quickly cool the coffee while preserving its bright flavors.
- Adjust the strength by adding cold water or milk to taste.
Master Coffee-to-Water Ratios
Your coffee-to-water ratio is crucial in determining the strength and flavor of your brew. While a 1:15 ratio (1 gram of coffee for every 15 grams of water) is standard, experimenting with different ratios can reveal new dimensions of flavor. For a stronger brew, try a 1:12 ratio; for a milder cup, go with 1:17.
| Ratio | Flavor Profile |
| 1:12 | Strong, bold, full-bodied |
| 1:15 | Balanced, standard brewing strength |
| 1:17 | Lighter, more delicate |
Fine-Tune Your Brewing Process
Fine-tuning your brew involves adjusting variables like temperature, steeping time, and grind size to elevate the flavor.
- Water Temperature: Lighter roasts benefit from lower temperatures (around 175-185°F), which enhance fruity and floral notes. Darker roasts shine at higher temperatures (closer to 200°F), bringing out richer, chocolatey characteristics.
- Steeping Time: Adjusting steeping times allows you to tailor the flavor to your liking. A shorter steep (30-40 seconds) brings out brighter acidity and lighter body, while a longer steep (1-2 minutes) emphasizes depth and richness.
Brewing for Different Coffee Origins
Understanding how coffee origins affect flavor can help you adjust your brewing technique for optimal results.
- African Beans (e.g., Ethiopian, Kenyan): These beans are known for their fruity, floral, and bright acidity. They often shine with lighter extractions and lower brewing temperatures (175-185°F), which help preserve their vibrant and complex flavors.
- Latin American Beans (e.g., Colombian, Brazilian): These beans offer rich, chocolatey, and nutty profiles. They often benefit from richer, fuller brewing techniques with slightly higher brewing temperatures (185-200°F). A longer steeping time can also help bring out their deeper flavors.
By adjusting your brewing method based on the origin of your coffee beans, you can unlock a wide range of flavors and truly appreciate the diversity of coffee.
Enhance Your Coffee with Flavors
Add a creative touch to your AeroPress brews by incorporating spices or unique ingredients.
- Spice it up: To introduce new layers of complexity, add a pinch of cinnamon, cardamom, or cocoa powder to your coffee grounds.
- Experiment with Unique Ingredients: Try adding vanilla extract, honey, or coconut oil to your brew. These ingredients complement the coffee’s natural flavors and offer a new sensory experience.
After mastering your AeroPress techniques, it’s time to reflect on how each brew enhances your coffee experience.
Pour, Taste, and Reflect: How to Use an Aeropress to Elevate Your Coffee Experience
Each brew with your AeroPress becomes more than just a coffee-making process—it evolves into a personal ritual. Whether you’re savoring a bold, espresso-like shot or a refreshing iced coffee, every cup reflects your care and experimentation.
Take a moment to appreciate the aromas and flavors in each sip. Your coffee’s nuances, from its rich depth to its bright acidity, are a direct result of the techniques and tweaks you’ve implemented.
The more you experiment with different methods, coffee-to-water ratios, and add-ins, the more you refine your brewing skills, making each cup unique and tailored to your taste.
Consider keeping a coffee journal to track your progress. By recording details such as grind size, water temperature, and brewing method, you’ll begin to see patterns that help you perfect your brew, ensuring consistency and precision in every cup.
Your coffee journey with AeroPress offers opportunities to explore, reflect, and elevate your experience. Whether you stick with a tried-and-true method or branch out into new brewing territory, AeroPress’s versatility allows you to enhance your daily coffee ritual continually.
We’d love to hear about your AeroPress brewing experiences! Share your tips or ask any questions in the comments below. Let’s connect and help each other discover new ways to brew the perfect cup.

Sonia Zannoni
I help coffee lovers experience the rich stories, origins, and luxury of high-end coffee. At Aroma Expeditions, I share my passion for sustainable sourcing, ethical beans, and the art behind every pour.
Let’s turn your daily brew into an adventure worth savoring.

Your AeroPress post is fantastic for both newbies and seasoned coffee lovers alike! I found the breakdown of the Classic and Inverted methods really insightful—especially how the Inverted method can deliver a bolder flavor. Your tips on grind size and water temperature cleared up a lot for me, particularly regarding balanced extraction.
The troubleshooting section was a lifesaver! I’ve struggled with the plunger being hard to press, and now I know it’s probably my grind size. I’m excited to try the advanced techniques and explore new flavors. Thanks for such a detailed post!
I’m so glad the post was helpful! It’s great to hear you found the breakdown of the Classic and Inverted methods useful—especially how the Inverted method brings out those bold flavors.
It’s awesome that the grind size and water temperature tips cleared things up for you. The troubleshooting section really does come in handy, and adjusting your grind should make the plunger easier to press.
As for the advanced techniques, they open up a whole new level of experimentation. You could try tweaking the steep time to see how it changes the flavor balance. I’d love to hear how those experiments go and what flavor profiles you discover!
This post is fantastic, Sonia! As someone who’s just started brewing with the AeroPress, I really appreciate the detailed and clear guidance. I’ve been using the Classic method, but after reading your tips, I’m excited to try the Inverted approach for a richer cup.
Your advice on grind size and water temperature really helped me understand where I was going wrong. I love how versatile the AeroPress is—I can’t wait to try the espresso-like concentrate!
One question: My plunger is sometimes hard to press. Could that be from using a too-fine grind? Thanks again for such a great guide!
I’m really glad the post was helpful! It’s great that you’re exploring AeroPress brewing, and I’m sure the Inverted method will give you that richer cup you’re after. I’m curious to hear how it goes!
Regarding the plunger, a finer grind is often the issue. Switching to a coarser grind should definitely make things smoother. You might also experiment with adjusting the steep time to see if that helps.
Let me know how the espresso-like concentrate turns out!