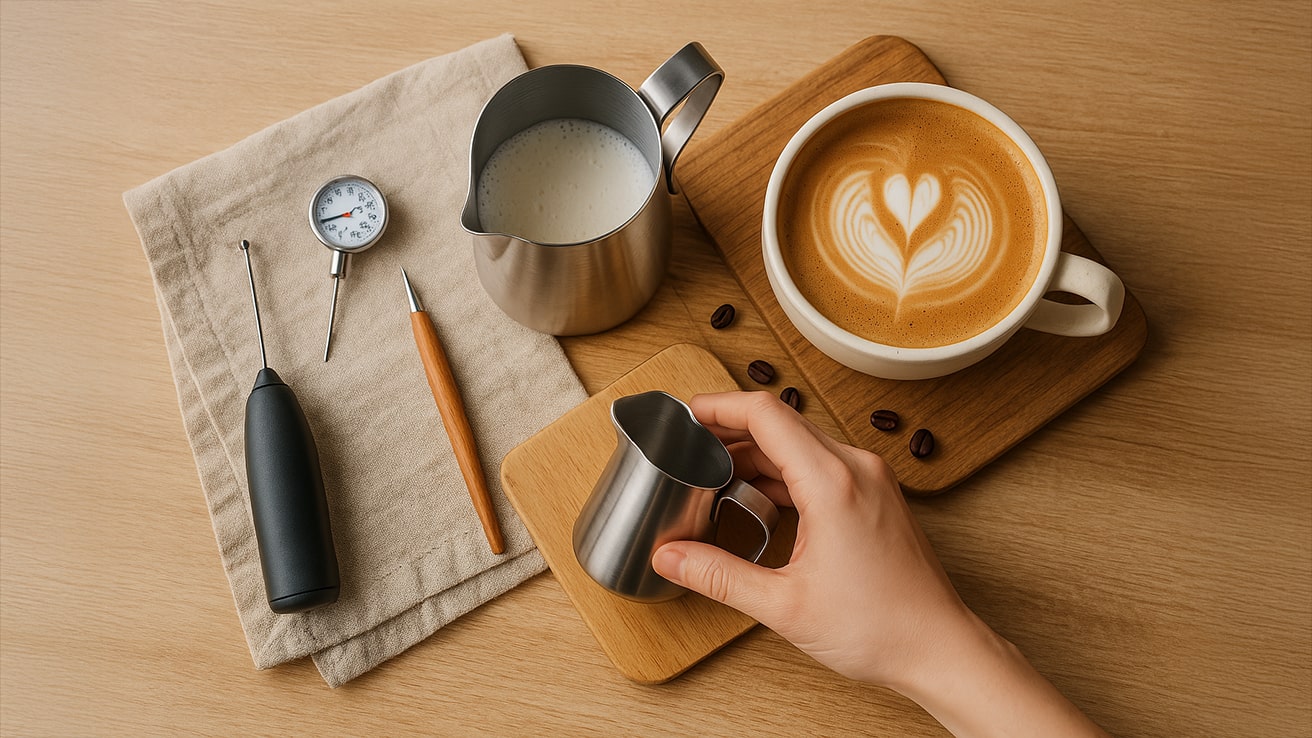
Latte Art Tools You’ll Actually Use
Affiliate Disclosure: As an Amazon Associate, I earn from qualifying purchases. This post may also contain other affiliate links, meaning I may earn a small commission if you buy through them, at no extra cost to you. Your support helps keep this site running and allows me to continue sharing great content. Thank you!
(No fluff, no overpriced gadgets, just practical tools that make a real difference.)
Latte art at home doesn’t require a drawer full of high-end gear. With a few smart tools and consistent practice, you can level up your coffee game in a seriously satisfying way. Whether you’re working with a budget setup or eyeing a few upgrades, this guide walks you through the gear that actually helps, no gimmicks, no latte art printers (yes, those exist), and definitely no regrets.
Milk Frother (If You Don’t Have a Steam Wand)
If your espresso machine doesn’t come with a steam wand, or you don’t have one yet, a standalone milk frother is your best friend.
- Look for one that creates creamy microfoam with small, consistent bubbles.
- Great for beginners using whole milk or barista-style plant milks.
- Froth after heating the milk for the best results.
The right frother gives your milk the silky texture latte art needs. Just avoid models that only whip milk into big bubbles; it won’t give you the control you need.

Stainless Steel Milk Pitcher (With Narrow Spout)
This is non-negotiable if you’re serious about learning latte art. The narrow spout gives you control during the pour, which is everything.
- Choose a 12-oz or 20-oz size based on your cup size and comfort.
- Pointed or tulip spouts are ideal for detailed designs.
- Bonus: Volume markings help with milk measurement.
Brands like Fellow, Rhino, and Motta consistently get rave reviews. But the real magic? The spout. That’s your paintbrush.

Thermometer (Optional but Beginner-Friendly)
If you’re new to steaming or frothing, a thermometer helps you avoid the dreaded burnt milk.
- Ideal temperature: 130–150°F (54–65°C)
- Helps build muscle memory for when you eventually go by touch
- Skip once you’ve got the feel down, but it’s a great training tool
Think of it as floaties for your milk. You won’t need it forever, but it helps you stay in the safe zone while you’re learning.
Latte Art Pen / Etching Tool
Once you’ve got basic pours down, a latte art pen lets you get creative without needing perfect foam or advanced control.
- Etch simple shapes like hearts, stars, or even a pumpkin face in October.
- Great for kids’ drinks or themed cups for guests.
- Also works for writing messages or patterns with cocoa dust.
Totally optional, but totally fun. Especially on a lazy Sunday when you’re in the mood to play.

Practice Pitcher or Cup for Pour Training
Want to practice without wasting milk? This hack’s for you.
- Fill a pitcher with water, a drop of dish soap, and (optional) a little food coloring.
- Practice hand movement, angles, and flow control.
- Builds confidence before you go live with steamed milk.
It’s especially helpful if you’re working with barista-style plant milks; no one wants to waste pricey oat milk during training. Some baristas even do a quick round of water-pouring between real drinks to refine wrist motion and grip.
Bonus Nice-to-Have Tools
These aren’t must-haves, but they can make things smoother, more fun, or more Instagram-friendly:
- Frothing jug warmer – helpful if you’re doing multiple pours or shooting latte art content.
- Latte art stencils – perfect for those who want consistent patterns without relying on the pour technique.
- Boards or saucers – for staging your final creation like a pro.

Tools You Probably Don’t Need (Yet)
It’s tempting to go all in, but most of these can wait:
- Automatic milk frothers with latte art presets – expensive and not always reliable.
- Latte art printers – yes, they exist, and no, they don’t help your pouring skills.
- Pour-over kettles – excellent for filter coffee, irrelevant for latte art.
Your goal right now? Focus on learning the skill, not outsourcing it to a robot.
Final Thoughts
If you’re just getting started, all you really need is a solid frother and a good pitcher. The rest? Optional upgrades you can explore as you go. Latte art isn’t about perfection; it’s about showing up, pouring again, and letting your hands learn the rhythm.
So start simple. Get messy. And have fun with it.
If you’re ready to go deeper, check out our guides on How to Froth Milk at Home and How to Pour Latte Art. They’ll walk you through technique, tips, and the satisfying chaos of early pours.
P.S. Bookmark this post before you fall down the gadget rabbit hole, start simple, pour often!

Sonia Zannoni
I help coffee lovers experience the rich stories, origins, and luxury of high-end coffee. At Aroma Expeditions, I share my passion for sustainable sourcing, ethical beans, and the art behind every pour.
Let’s turn your daily brew into an adventure worth savoring.
