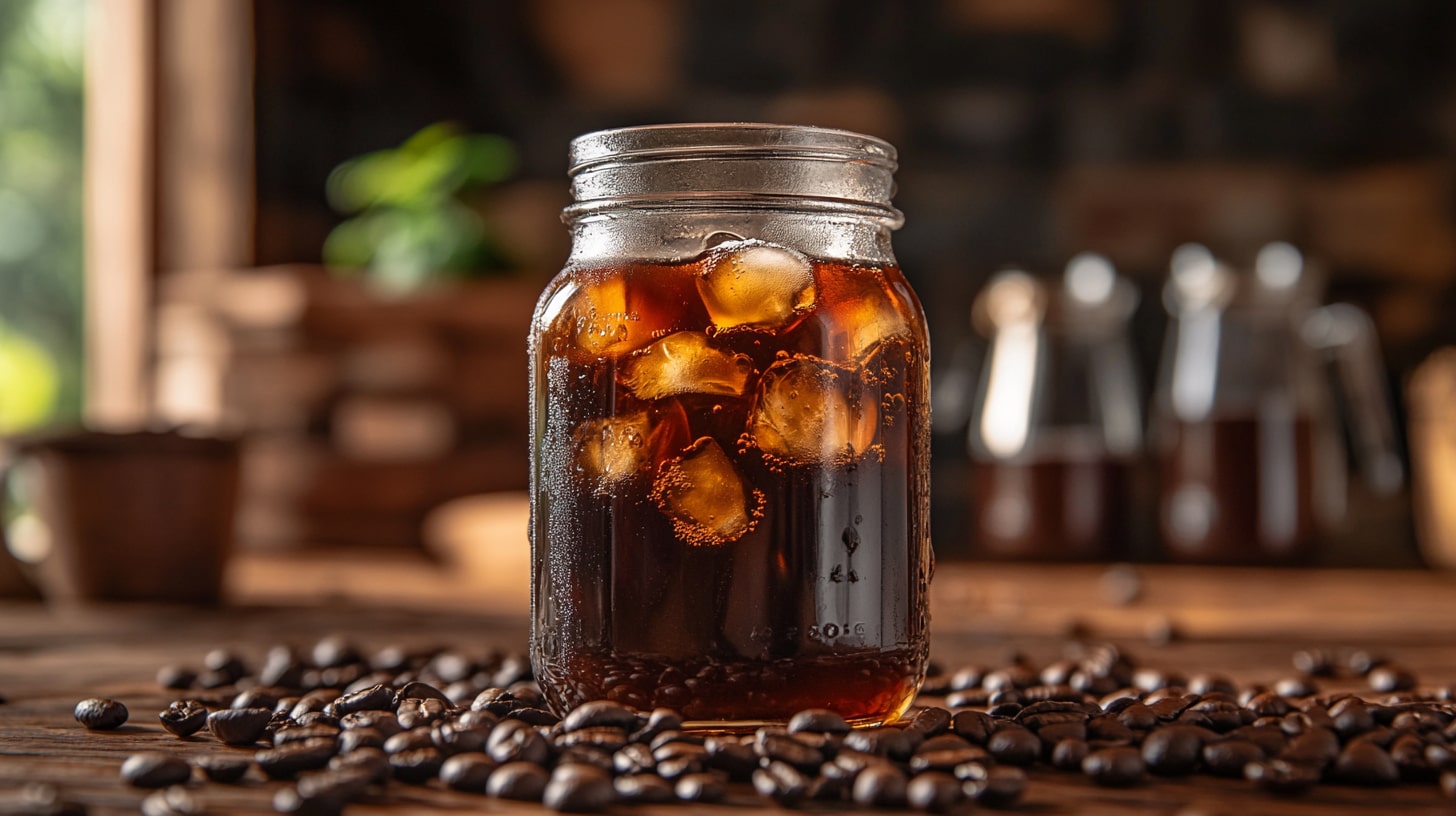
Make Homemade Cold Brew Coffee: Step-by-Step Guide
Affiliate Disclosure: As an Amazon Associate, I earn from qualifying purchases. This post may also contain other affiliate links, meaning I may earn a small commission if you buy through them, at no extra cost to you. Your support helps keep this site running and allows me to continue sharing great content. Thank you!
Did you know that cold brew coffee sales have jumped by over 580% in the past decade? As a coffee lover, this smooth, low-acid beverage has likely caught your attention. If you’re curious about how to make homemade cold brew coffee, you’re in the right place.
Last summer, I started making cold brew at home and discovered how easy it is and how customizable it can be to suit any taste. Making cold brew at home allows you to craft a drink that perfectly suits your taste.
Making cold brew at home has become increasingly popular because it is more cost-effective than daily café trips and allows you to experiment with different beans, brew times, and flavors. You control every aspect, from the strength of your brew to the unique flavors you might want to infuse.
Whether you’re drawn to its cost-effectiveness or the ability to experiment with flavors and brewing times, this guide will walk you through every step, ensuring you end up with a delicious, refreshing brew right from your kitchen.
Key Takeaways
- Ratio Matters: Start with a 1:4 coffee-to-water ratio for a balanced brew. Adjust for strength as needed.
- Steep Time: Let your cold brew steep for 12-24 hours. Longer steeping gives a stronger, richer flavor.
- Grind Coarsely: Always use a coarse grind to avoid over-extraction and ensure smoothness.
- Customization: Control every aspect of your cold brew, from flavor infusions to strength, tailoring each batch to your taste.
- Storage: Store cold brew in an airtight glass container for up to two weeks, though it’s best to consume within a week for optimal flavor.
Now that you understand the benefits of making cold brew at home, let’s explore the essentials for starting your own refreshing brew.
Essentials for Making Homemade Cold Brew Coffee
The foundation of any great cold brew lies in the beans. Choose high-quality, freshly roasted coffee beans for a smoother, less acidic cup. Medium to dark roasts offer a rich, full-bodied flavor that shines in cold brewing. If you’re feeling adventurous, try single-origin beans for unique flavor profiles. Freshness is key, so aim for recently roasted beans to get the best results.
The Importance of Filtered Water for Flavor
Water plays a major role in the final taste of your cold brew. Using filtered water helps ensure no off-flavors or impurities interfere with your brew’s purity. Tap water can sometimes introduce unwanted flavors, so opt for filtered or bottled spring water to maintain a clean and crisp taste.
Essential Tools for Brewing Cold Brew at Home
Making cold brew at home doesn’t require specialized equipment, but the right tools can ensure consistent results. Here’s a breakdown of what you’ll need:
| Equipment | Purpose |
| Large Jar or Container | For steeping your coffee grounds and water mixture. |
| Coffee Filters or Fine-Mesh Sieve | Essential for straining out coffee grounds after steeping, ensuring a smooth brew. |
| French Press (Optional) | It provides a consistent coarse grind, which is essential for optimal cold brew extraction. |
| Burr Grinder (Optional) | Provides a consistent coarse grind, essential for optimal cold brew extraction. |
| Kitchen Scale (Optional) | It can double as a steeping vessel and strainer, simplifying the process. |
These tools will equip you to craft your perfect cold brew, whether you prefer a simple approach or want to aim for barista-level precision. Remember, you don’t need all the fancy equipment; just the right ingredients and a bit of patience will go a long way in crafting a delicious brew.
No specialized equipment? No problem! Watch this video to learn how to make cold brew coffee using simple, everyday tools.
With your ingredients and tools in hand, it’s time to move on to the fun part: brewing your own cold brew coffee. Follow these simple steps to craft a delicious brew right from your kitchen.
Step-by-Step: How to Make Homemade Cold Brew Coffee
Coffee-to-Water Ratio: Finding the Perfect Balance
The coffee-to-water ratio is fundamental, influencing both the strength and flavor of your cold brew. Start with a ratio of 1:4, which offers a balanced extraction that suits most preferences. For example, combine 1 cup of coarsely ground coffee with 4 cups of filtered water.
- For a lighter brew (ideal for drinking over ice or as a refreshing beverage), the standard 1:4 ratio is perfect as it maintains flavor without becoming too concentrated when diluted.
- For a stronger concentrate, you can adjust to a 1:3 ratio. This creates a more robust brew, ideal for coffee lovers who enjoy bold, intense flavors or plan to mix their cold brew with milk or use it in coffee-based cocktails.
Experiment with these ratios to find your ideal strength. Remember, it’s easier to dilute a strong brew than to try to concentrate a weak one, so don’t be afraid to start strong and adjust.
Grind Size: The Key to Cold Brew Flavor
Grind size is crucial for proper extraction and optimal flavor. A coarse grind (similar to sea salt) is ideal because it slows down the extraction process, preventing the coffee from becoming over-extracted and bitter.

| Grind Size | Brewing Time | Characteristics | Impact on Flavor |
| Coarse | 12-24 hours | Chunky, like sea salt | Smooth, well-rounded, low acidity |
| Medium | 8-12 hours | Gritty, similar to coarse sand | Balanced, but may lack depth |
| Fine | Not recommended | Powdery, comparable to table salt | Over-extracted, bitter, and acidic |
Mixing Coffee and Water: Step-by-Step Instructions
To create your cold brew, it’s crucial to mix the coffee and water properly for even extraction and optimal flavor. Here’s how to do it:
- Add Coffee: Place your coarsely ground coffee into a large jar, French press, or pitcher. Using a container with a wide opening will make it easier to mix the grounds and water.
- Pour in Water: Slowly pour filtered water over the coffee grounds, making sure all the grounds are fully saturated. Pouring in a circular motion helps distribute the water evenly and prevents dry pockets of coffee.
- Stir and Steep: Stir gently, then cover your container and let it steep.

Your steeping location and time will impact the flavor, as shown in the table below:
| Steeping Location | Temperature Range | Steeping Time | Flavor Profile |
| Room Temperature | 68-77°F (20-25°C) | 12-16 hours | Mild to balanced |
| Refrigerator | 35-40°F (1.6-4.4°C) | 16-24 hours | Balanced to robust |
For a smoother, less acidic brew, steeping in the refrigerator for a longer period (16-24 hours) is recommended. If you prefer a quicker brew, steeping at room temperature for 12-16 hours works well, though it may result in a more pronounced flavor.
Straining Your Cold Brew: Achieving a Smooth Finish
After steeping, it’s time to strain the coffee to separate the grounds from the liquid concentrate. Here are your options:
- Fine-Mesh Sieve: This is a quick and easy option for straining, but it may allow some sediment to pass through. A fine-mesh sieve works well if you don’t mind a little texture in your brew.
- Handheld Filters: Paper or cloth filters are ideal for those who prefer a completely smooth, grit-free coffee. These filters will capture even the finest particles, ensuring a clean final product.
- Nut Milk Bag: A reusable nut milk bag can also serve as a straining tool. It’s durable, easy to clean, and captures fine sediment. Plus, it’s a sustainable option for those looking to reduce waste.
- French Press: If you are using the French Press method to steep your cold brew, it can double as your strainer by pressing down the plunger. This method is convenient but may allow some finer particles to remain in the brew.
After straining, transfer the cold brew concentrate into a glass container and store it in the fridge for up to two weeks. For a perfect drink every time, dilute the concentrate with water, milk, or your favorite dairy-free alternative to your liking. If you prefer a stronger brew, add less liquid; for a lighter brew, dilute more.
Ready to see the process in action? Watch this step-by-step video to learn how to make cold brew coffee at home easily.
With your cold brew concentrate ready, it’s essential to avoid common mistakes that could spoil your brew. Let’s explore how to steer clear of the most frequent pitfalls when making cold brew.
Common Mistakes to Avoid When Making Homemade Cold Brew Coffee
Even though making cold brew coffee is a simple process, a few common mistakes can lead to disappointing results. Here’s how to avoid the most frequent pitfalls:
Mistake #1: Using the Wrong Grind Size
- The Problem: Using a fine or medium grind.
- Why It Matters: A fine grind causes over-extraction, leading to a bitter, overly strong brew.
- How to Avoid It: Using the right grind size is crucial for avoiding over-extraction. As discussed earlier, a coarse grind is ideal for achieving a balanced flavor.
- Troubleshooting: If you’ve already brewed your cold brew and it’s too bitter, it could be due to over-extraction caused by a finer grind. Next time, grind your beans coarser and consider reducing steeping time to find the perfect balance.
Mistake #2: Incorrect Coffee-to-Water Ratio
- The Problem: Adding too much or too little coffee to the water.
- Why It Matters: An incorrect ratio can throw off the balance of your brew. Too much coffee makes it overly strong and bitter, while too little results in a weak, watery drink.
- How to Avoid It: Start with a 1:4 coffee-to-water ratio. Adjust as needed to match your taste, keeping in mind that this ratio strikes a balance between strength and flavor.
- Troubleshooting: If your cold brew ends up too strong, simply dilute it with water or milk. Start with a small amount and adjust to taste, gradually finding the perfect balance for your preferences.
Mistake #3: Cutting Corners on Steeping Time
- The Problem: Not giving your cold brew enough time to steep.
- Why It Matters: Cold brew needs time to develop its smooth, rich flavor. Rushing the process results in a weak, under-extracted brew.
- How to Avoid It: Allow your cold brew to steep for 12 to 24 hours, depending on the strength you prefer. Patience is key for a flavorful brew.
- Troubleshooting: If your brew is too weak after a shorter steep time, try steeping it for a few more hours. Alternatively, if your cold brew becomes too strong, adjust by diluting it or by using a lighter coffee-to-water ratio in your next batch.
Mistake #4: Using Unfiltered Water
- The Problem: Using tap water without filtering it.
- Why It Matters: Tap water can contain impurities that affect the flavor of your cold brew, resulting in off-flavors or a dull taste.
- How to Avoid It: Always use filtered or bottled water to ensure a clean, crisp flavor in your cold brew.
- Troubleshooting: If you’ve already brewed with tap water and notice off-flavors, try using it as a base for flavored cold brew by adding ingredients like vanilla, cinnamon, or citrus zest to mask any undesirable taste. For future batches, switch to filtered water to improve the overall quality of your brew.
Mistake #5: Ignoring the Quality of Coffee Beans
- The Problem: Using stale or low-quality coffee beans.
- Why It Matters: The quality of your coffee beans directly impacts the flavor of your cold brew. Stale or low-quality beans lead to a flat, lackluster brew.
- How to Avoid It: Choose freshly roasted, high-quality beans, preferably medium to dark roasts, for a rich, vibrant cold brew.
- Pro Tip: To maintain the freshness of your beans, store them in an airtight container away from light and heat. Grind your beans just before brewing to capture their full aromatic profile.
Avoiding these mistakes will ensure a consistently delicious cold brew. Now, let’s explore how to customize your cold brew to suit your unique taste.
Customize Your Cold Brew: Adjusting Strength and Flavor
One of the great benefits of cold brew is its versatility, allowing you to adjust the strength and flavor to suit your preferences easily. Start by experimenting with the coffee-to-water ratio and steeping time:
- For a Stronger Brew: Use a higher coffee-to-water ratio, such as 1:3, or extend the steeping time up to 24 hours. This will result in a more robust and intense flavor. You can also reduce the amount of diluting liquid (water, milk, or a non-dairy alternative) after brewing.
- For a Lighter Brew: Opt for a lower coffee-to-water ratio, such as 1:5, or shorten the steeping time to around 12 hours. This will give you a milder, smoother flavor. If the brew is still too strong, increase the amount of diluting liquid to your taste.
Remember, it’s easier to dilute a strong brew than to concentrate a weak one, so don’t hesitate to start with a stronger mix and adjust from there. The key is to experiment until you find the perfect balance that matches your palate.
With your cold brew perfectly customized to your taste, you might still have a few questions about this popular brewing method. Below, we’ve answered some of coffee lovers’ most common questions about cold brew.
Is Cold Brew Coffee Stronger than Regular Coffee?
Cold brew is typically less acidic and smoother than regular coffee, but the strength really depends on how you make it. Since cold brew is often brewed as a concentrate, you can dilute it to match your desired strength, making it more versatile than a regular cup of coffee.
Flavor Infusion Ideas: Adding a Twist to Your Cold Brew
Why settle for plain cold brew when you can infuse it with exciting flavors? Try these infusion ideas to add an extra layer of complexity:
- Vanilla Bean: Split a vanilla bean and add it to your coffee grounds before steeping. Steep for the full duration to allow the subtle sweetness to meld with the coffee’s richness.
- Cinnamon Stick: Add a cinnamon stick for a warm, spicy note. To prevent it from becoming too strong, consider removing the cinnamon stick after 12 hours of steeping.
- Citrus Zest: Add a tablespoon of orange or lemon zest to the grounds for a bright, refreshing twist. Steep the citrus for the full duration to extract the oils and flavor, but be careful not to overdo it; too much zest can make the brew bitter.
These infusions meld with the coffee during brewing, creating a drink that’s uniquely yours.
Creative Ways to Enjoy Cold Brew
Cold brew is incredibly versatile and can be enjoyed in various ways. Here are some serving ideas:
- Over Ice: The classic way to serve cold brew. Pour your diluted cold brew over a glass of ice for a refreshing pick-me-up.
- With Cream or Milk: Add a splash of cream, milk, or your favorite non-dairy alternative for a richer, smoother drink.
- As a Coffee Cocktail Base: Cold brew makes a great base for coffee cocktails. Mix it with rum, whiskey, or Kahlúa for a fun, adult twist on your favorite brew.
Customizing your cold brew is all about experimenting with different flavors, strengths, and serving styles to create a drink you truly love. Don’t hesitate to try new combinations and find your perfect cold brew recipe.
With your cold brew just right, let’s explore how to keep it fresh and ready to enjoy.
How to Store Homemade Cold Brew Coffee for Maximum Freshness
Proper storage is key to preserving the flavor and freshness of your cold brew coffee. Follow these best practices to keep your homemade cold brew tasting as delicious as the first sip.
Refrigeration: Maintaining Freshness and Flavor
Once your cold brew is strained, transfer it into a clean, airtight container and store it in the refrigerator. The cool temperature slows down oxidation, keeping your coffee’s flavor and aroma intact.

Storage Time: Cold brew can last up to two weeks in the fridge. However, for optimal taste, aim to finish it within the first week. After seven days, the brew may start losing its vibrant taste and freshness.
Choosing the Right Container: Glass vs. Plastic
When storing your cold brew, the type of container you choose can greatly affect its freshness and flavor. Glass and plastic containers each have their own advantages and drawbacks. The table below provides a quick comparison to help you decide which option is best for your needs:
| Storage Method | Pros | Cons |
| Glass Containers | Non-porous, won’t absorb flavors or odors | Heavier, more fragile |
| Plastic Containers | Lightweight, durable | May absorb flavors and odors over time |
Glass Containers:
Tip: Use glass containers for longer storage periods to maintain flavor purity.
Plastic Containers:
Tip: Only use plastic containers for short-term storage to minimize the risk of flavor contamination.
Now that you’ve chosen the best container, here are some best practices for storing large batches to keep your cold brew fresh and flavorful.
Best Practices for Storing Large Batches
If you’ve made a large batch of cold brew, here are some tips to keep it fresh longer:
- Portioning: To keep your cold brew fresh longer, divide it into smaller, airtight containers. This minimizes air exposure each time you open a container, preserving the flavor and freshness.
- Freezing: If you’re unable to finish your cold brew within a week, consider freezing it in ice cube trays. These cubes can be used to chill your cold brew without diluting it or simply extend its shelf life for future use.
A common question among home brewers is whether they can reuse their cold brew coffee grounds.
Can You Reuse Cold Brew Coffee Grounds?
While it’s possible to reuse cold brew coffee grounds, the second batch will be weaker and less flavorful. For the best experience, it’s worth using fresh grounds each time to keep the richness and depth that make cold brew so enjoyable.
By focusing on proper storage, every sip of your homemade cold brew can be as rich and smooth as the first. Whether you prefer glass or plastic or you’re storing a small or large batch, these tips will help keep your cold brew fresh for days.
With your cold brew stored and ready, let’s bring it all together with a few final tips to help you perfect your homemade brew.
Crafting the Perfect Cold Brew at Home: Final Tips
Brewing your own cold brew coffee at home is not just a cost-effective alternative to frequent café visits; it’s a rewarding experience that allows you to tailor each batch to your exact preferences. By following the steps outlined in this guide, from selecting the right beans and grind size to avoiding common mistakes and storing your brew properly, you can enjoy a rich, smooth cold brew that’s truly your own creation.
Don’t be afraid to push the boundaries, try infusing your cold brew with different flavors, or explore new brewing techniques to create a drink that’s uniquely yours. Whether you’re a seasoned coffee enthusiast or a newcomer to the world of cold brew, the process of making and customizing your brew offers endless possibilities.
There’s something deeply satisfying about crafting a cold brew that not only meets but exceeds what you’d get at a café. Your homemade cold brew reflects your personal taste, giving you control over every element of the process.
Got questions or comments about making homemade cold brew coffee? Share them below, and let’s continue the conversation!
Have you tried a unique twist on your cold brew? Let us know your favorite flavors or methods. What cold brew twist are you excited to try next?
We’re here to help you perfect your brew and grow our community of cold brew enthusiasts together!

Sonia Zannoni
I help coffee lovers experience the rich stories, origins, and luxury of high-end coffee. At Aroma Expeditions, I share my passion for sustainable sourcing, ethical beans, and the art behind every pour.
Let’s turn your daily brew into an adventure worth savoring.

First of all, wow! I didn’t know I needed this post as much as I did. I’ve always leaned towards cold brew since it’s smooth and refreshing—plus, living in South Texas, the heat makes hot coffee a tough sell (though I still drink it!). After reading this, I might switch to cold brew permanently.
Your post makes me feel confident about making it at home, and I can’t wait to try it and report back. The emphasis on choosing the right beans and using filtered water really stood out to me—I hadn’t realized how much of a difference water quality can make!
The key takeaways section is something I’ll definitely share with my wife. Seriously, though, this is an excellent resource that I’ll be reviewing again.
Thank you so much for your kind words! I’m really glad the post resonated with you, especially as someone who doesn’t drink a lot of coffee but enjoys cold brew. Living in a hot place like South Texas, cold brew is definitely a refreshing option!
I’d love to hear how your first homemade batch turns out—feel free to report back! Filtered water and the right beans really do make a noticeable difference, and it’s great that you picked up on that.
Good luck with your brewing, and I’m thrilled you found the key takeaways helpful!
Wow, your guide on making homemade cold-brew coffee is a total game-changer! I’ve been brewing my own for a while, but I never nailed down the perfect coffee-to-water ratio until I read your article.
The tip about steeping time was a revelation, too. Have you experimented with different types of coffee beans or blends that stand out for cold brew? I’d also love to hear any quirky flavor additions you might suggest!
Do you think there’s a big taste difference when using a French Press compared to traditional methods? Thanks for sharing such valuable content!
I’m thrilled to hear that the guide helped you fine-tune your cold brew! It’s amazing how small adjustments like coffee-to-water ratio and steeping time can elevate your brew.
For beans, I’ve had great results with medium and dark roasts—single-origin beans tend to shine in cold brew because they bring out deep, smooth flavors.
As for quirky flavor additions, if you’re looking for something a bit different, you can also experiment with infusing your cold brew with lavender, cardamom, or a pinch of nutmeg for a more aromatic twist. Flavored syrups like hazelnut or coconut are also great for adding a bit of sweetness, and if you’re feeling adventurous, a dash of chocolate bitters can add depth to the brew.
The French Press does add more body compared to traditional methods, which can give your cold brew a slightly richer mouthfeel. However, if you prefer a cleaner, smoother result, traditional steeping might be your go-to.
Thanks for your thoughtful comment, and I hope these suggestions inspire some fun brewing experiments!
Happy brewing!